
The Process
The process of making a hand-burnished linocut print edition can take me anywhere from one to six months depending on the size, design, and number of colors. Working large has presented many challenges but my goal is to continue to "go big".
Below you can see the steps that go into making a print edition.

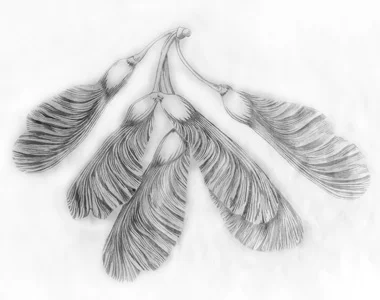
Photograph
All of my linocut editions are based on my own photography. I try and walk everyday and it is rare that I don't come home with photographs of some treasure I found on my outing.
The hard part when starting a print is choosing my favorite photo.
Sketch
Once a reference photo is chosen I make a pencil sketch to the final size I want the print. Sometimes the sketch closely resembles the photo but sometimes I change it up. It depends on the subject and photo.

Transfer
After completing the full-size pencil sketch I transfer the sketch to my linoleum (or safety-kut). If I am using safety-kut all I have to do is turn the sketch over and burnish to transfer the image. If I am using linoleum saral paper can be used.

Carve
Carving the design is my favorite part of the process. I am currently using Flexcut carving tools and have been quite happy with the slipstrop they sell to keep the blades sharp.
In this image I have cut the background away but that is only necessary when I print the background in a different color.

Color Testing and Proofing
Mixing the perfect color is very important and not always easy. I use oil-based ink and have found it helpful to pull a proof on the type of paper that will be used for the final prints. I often have reject prints from past projects that work fine for this.
It is also helpful to pull a proof to finally see the design and to make changes before the "real" printing day.

Ink the Plate
Once final changes have been made to the plate it is time to print. The ink is rolled out onto a piece of plexiglass with a brayer and then rolled onto the linoleum.

Print First Color
Once enough ink has been transferred to the plate a piece of paper is placed onto the inked plate. I then use a japanese baren to burnish, burnish, burnish! The fun part is peeling up the paper to hopefully reveal a perfect print.
In this example you can see the background was printed first.

Print Second Color
The next color for this print was the green background color of the maple helicopters. Registration is of utmost importance when printing multiple colors. If registration is off the print is ruined.
This print was a reduction cut. That means once the green color was printed the plate was carved into again for the final color.

Print Third Color
Here you can see the final color has been printed onto the green.

Drying
When using oil-based ink dry time can be up to one month. This can be a real issue when printing multiple color prints. I recently tried using a cobalt additive to shorten the dry time.
This image was taken before I bought my drying rack. It is hard to work large and have enough space for drying!

Print Chop
On several of my prints I use a chop signature in addition to my real signature. I like the look of it but have to admit some times it makes me nervous to apply it to my perfect prints!

Sign
Each print is signed, titled and has the edition number in pencil at the bottom (unless it is a full page print and then it is on the back).

Frame
Although the majority of prints are for purchase without frames, several are available with frames. This will be indicated in the title and description.

Decorate
It is so much fun to see my prints framed and placed on the wall. If you purchase a print I would love to see photos!
“But the beauty is in the walking — we are betrayed by destinations.
”